


38. Operational Insight: How to complete a Bathroom Deep Clean
Including a workflow you can swipe

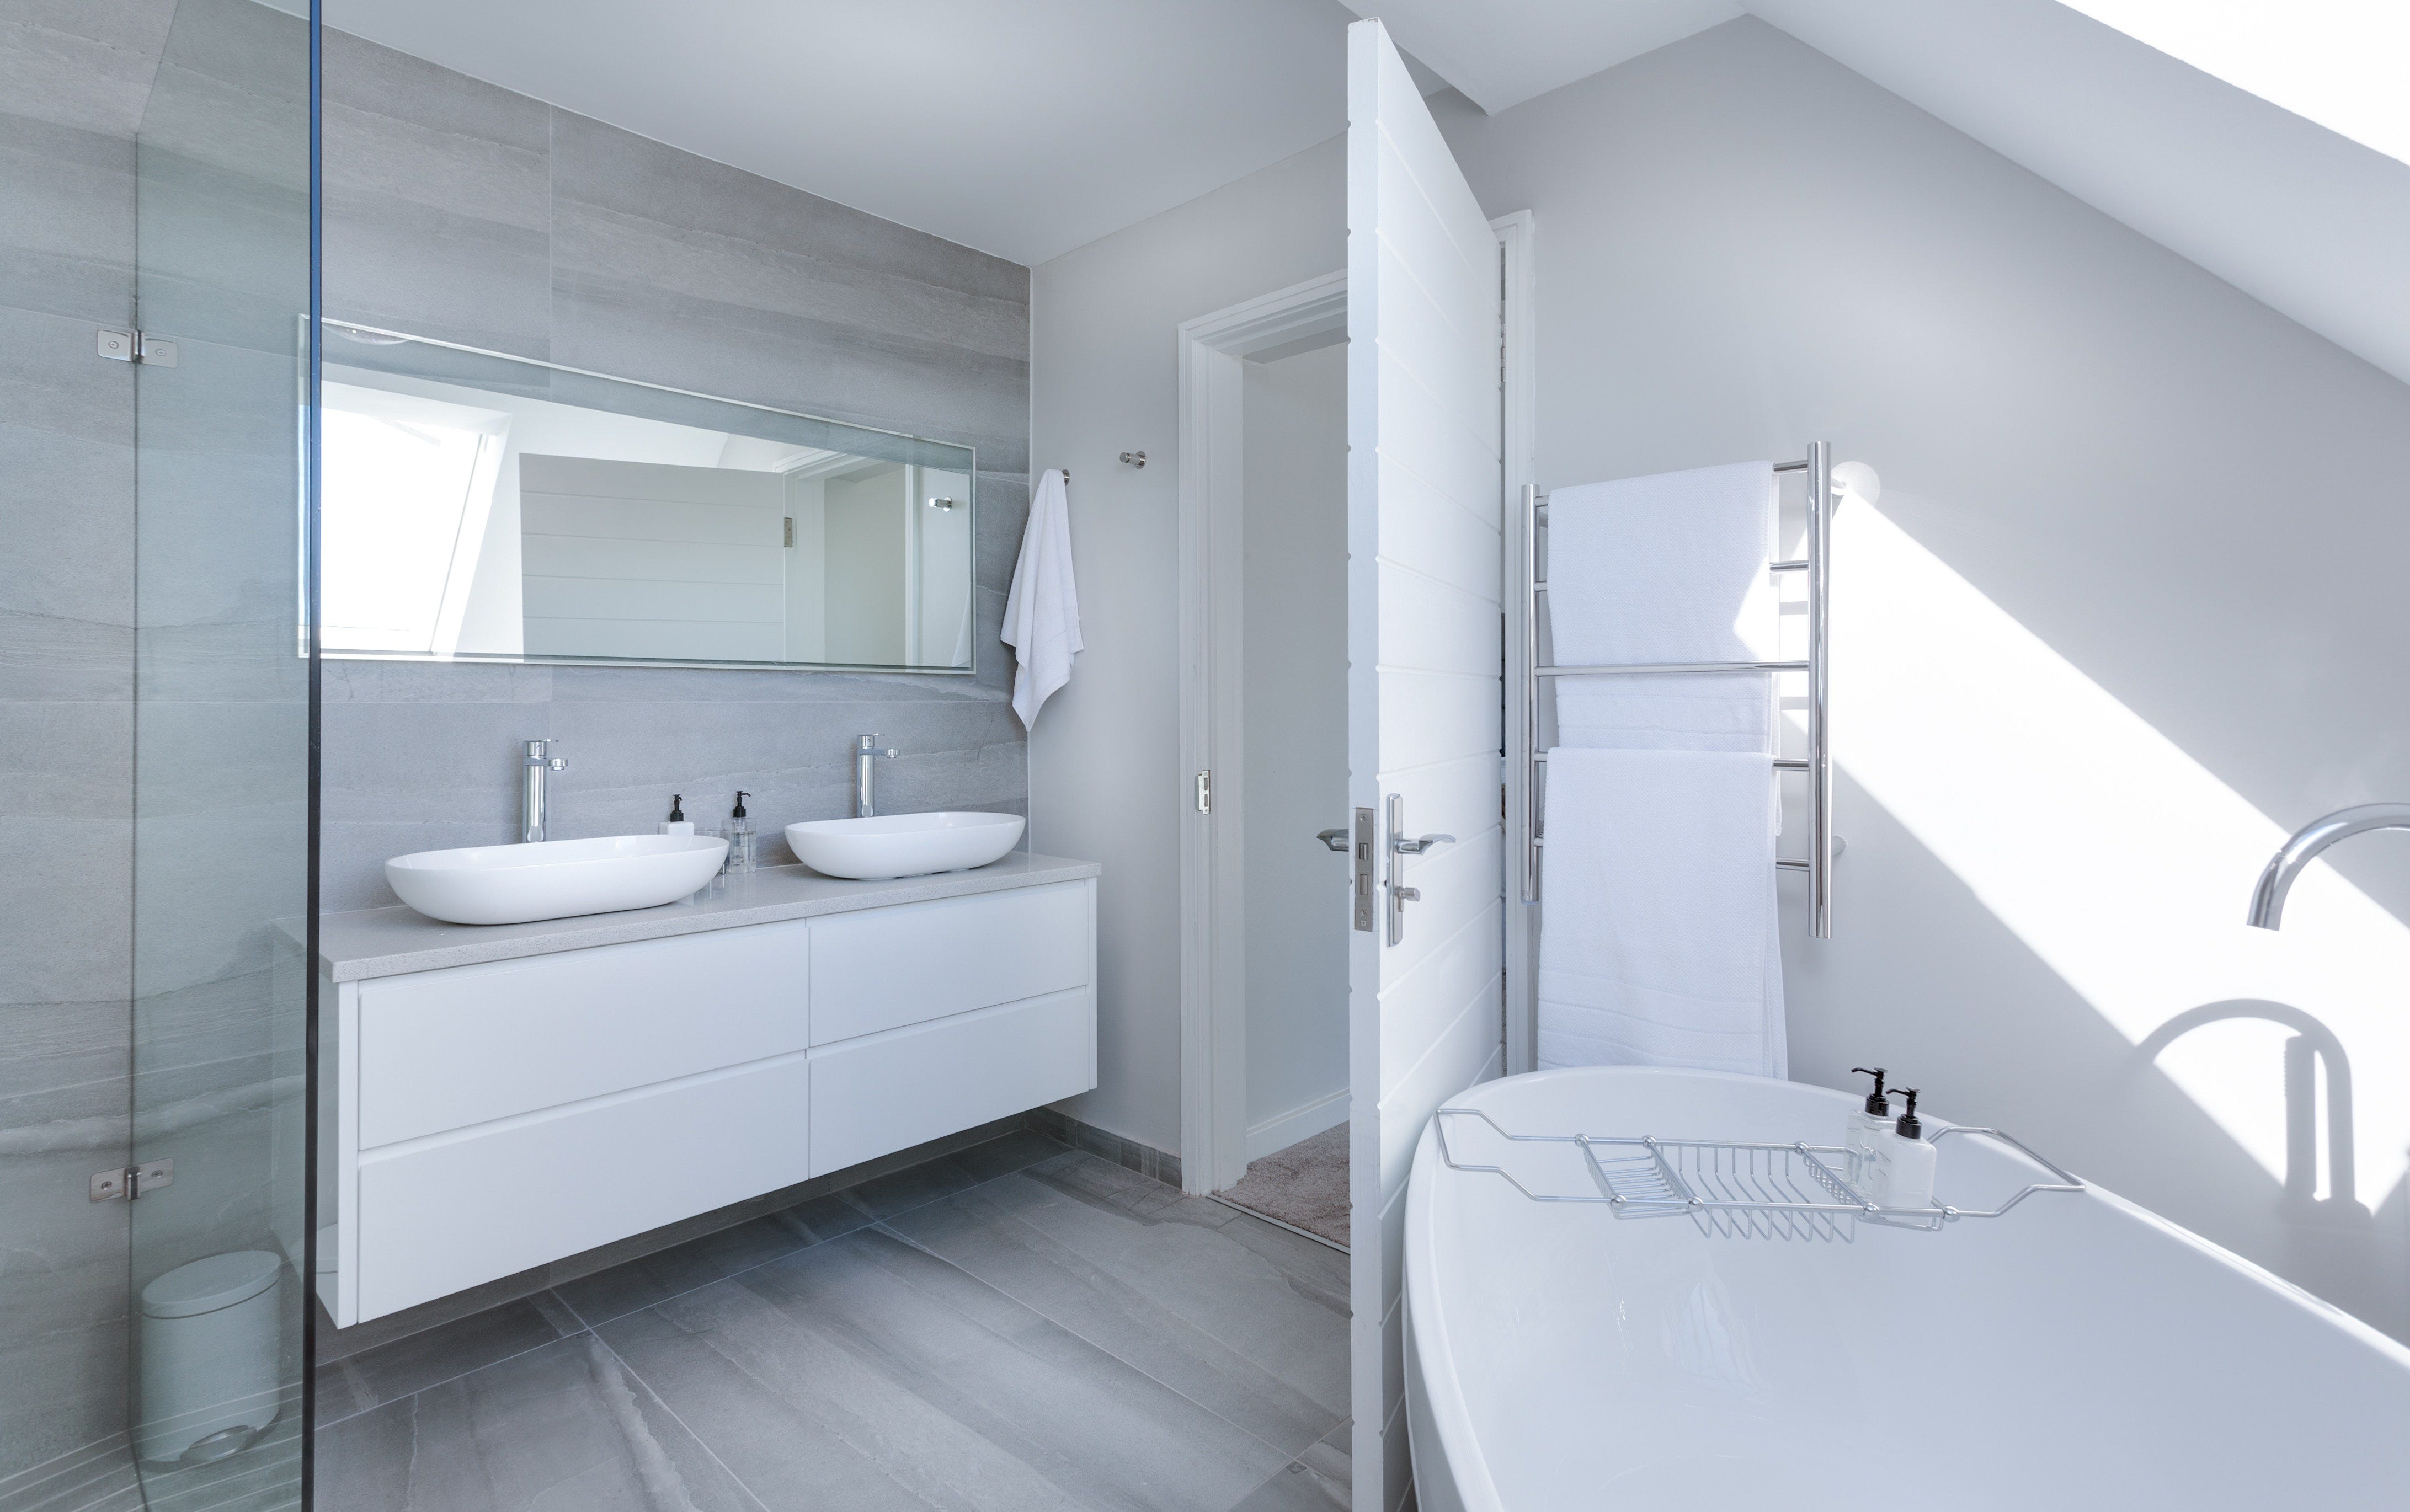
This week’s deep cleaning workflow is focuses on the bathroom.
Bathrooms can be a pain to clean because hard water creates limescale, which gets everywhere.
If you missed last week’s edition where I break down the kitchen cleaning workflow, you can read it here:

Agenda
Products
Equipment
Prepare the clean
Biggest area first
Detailing
Clean out
Here’s the workflow:
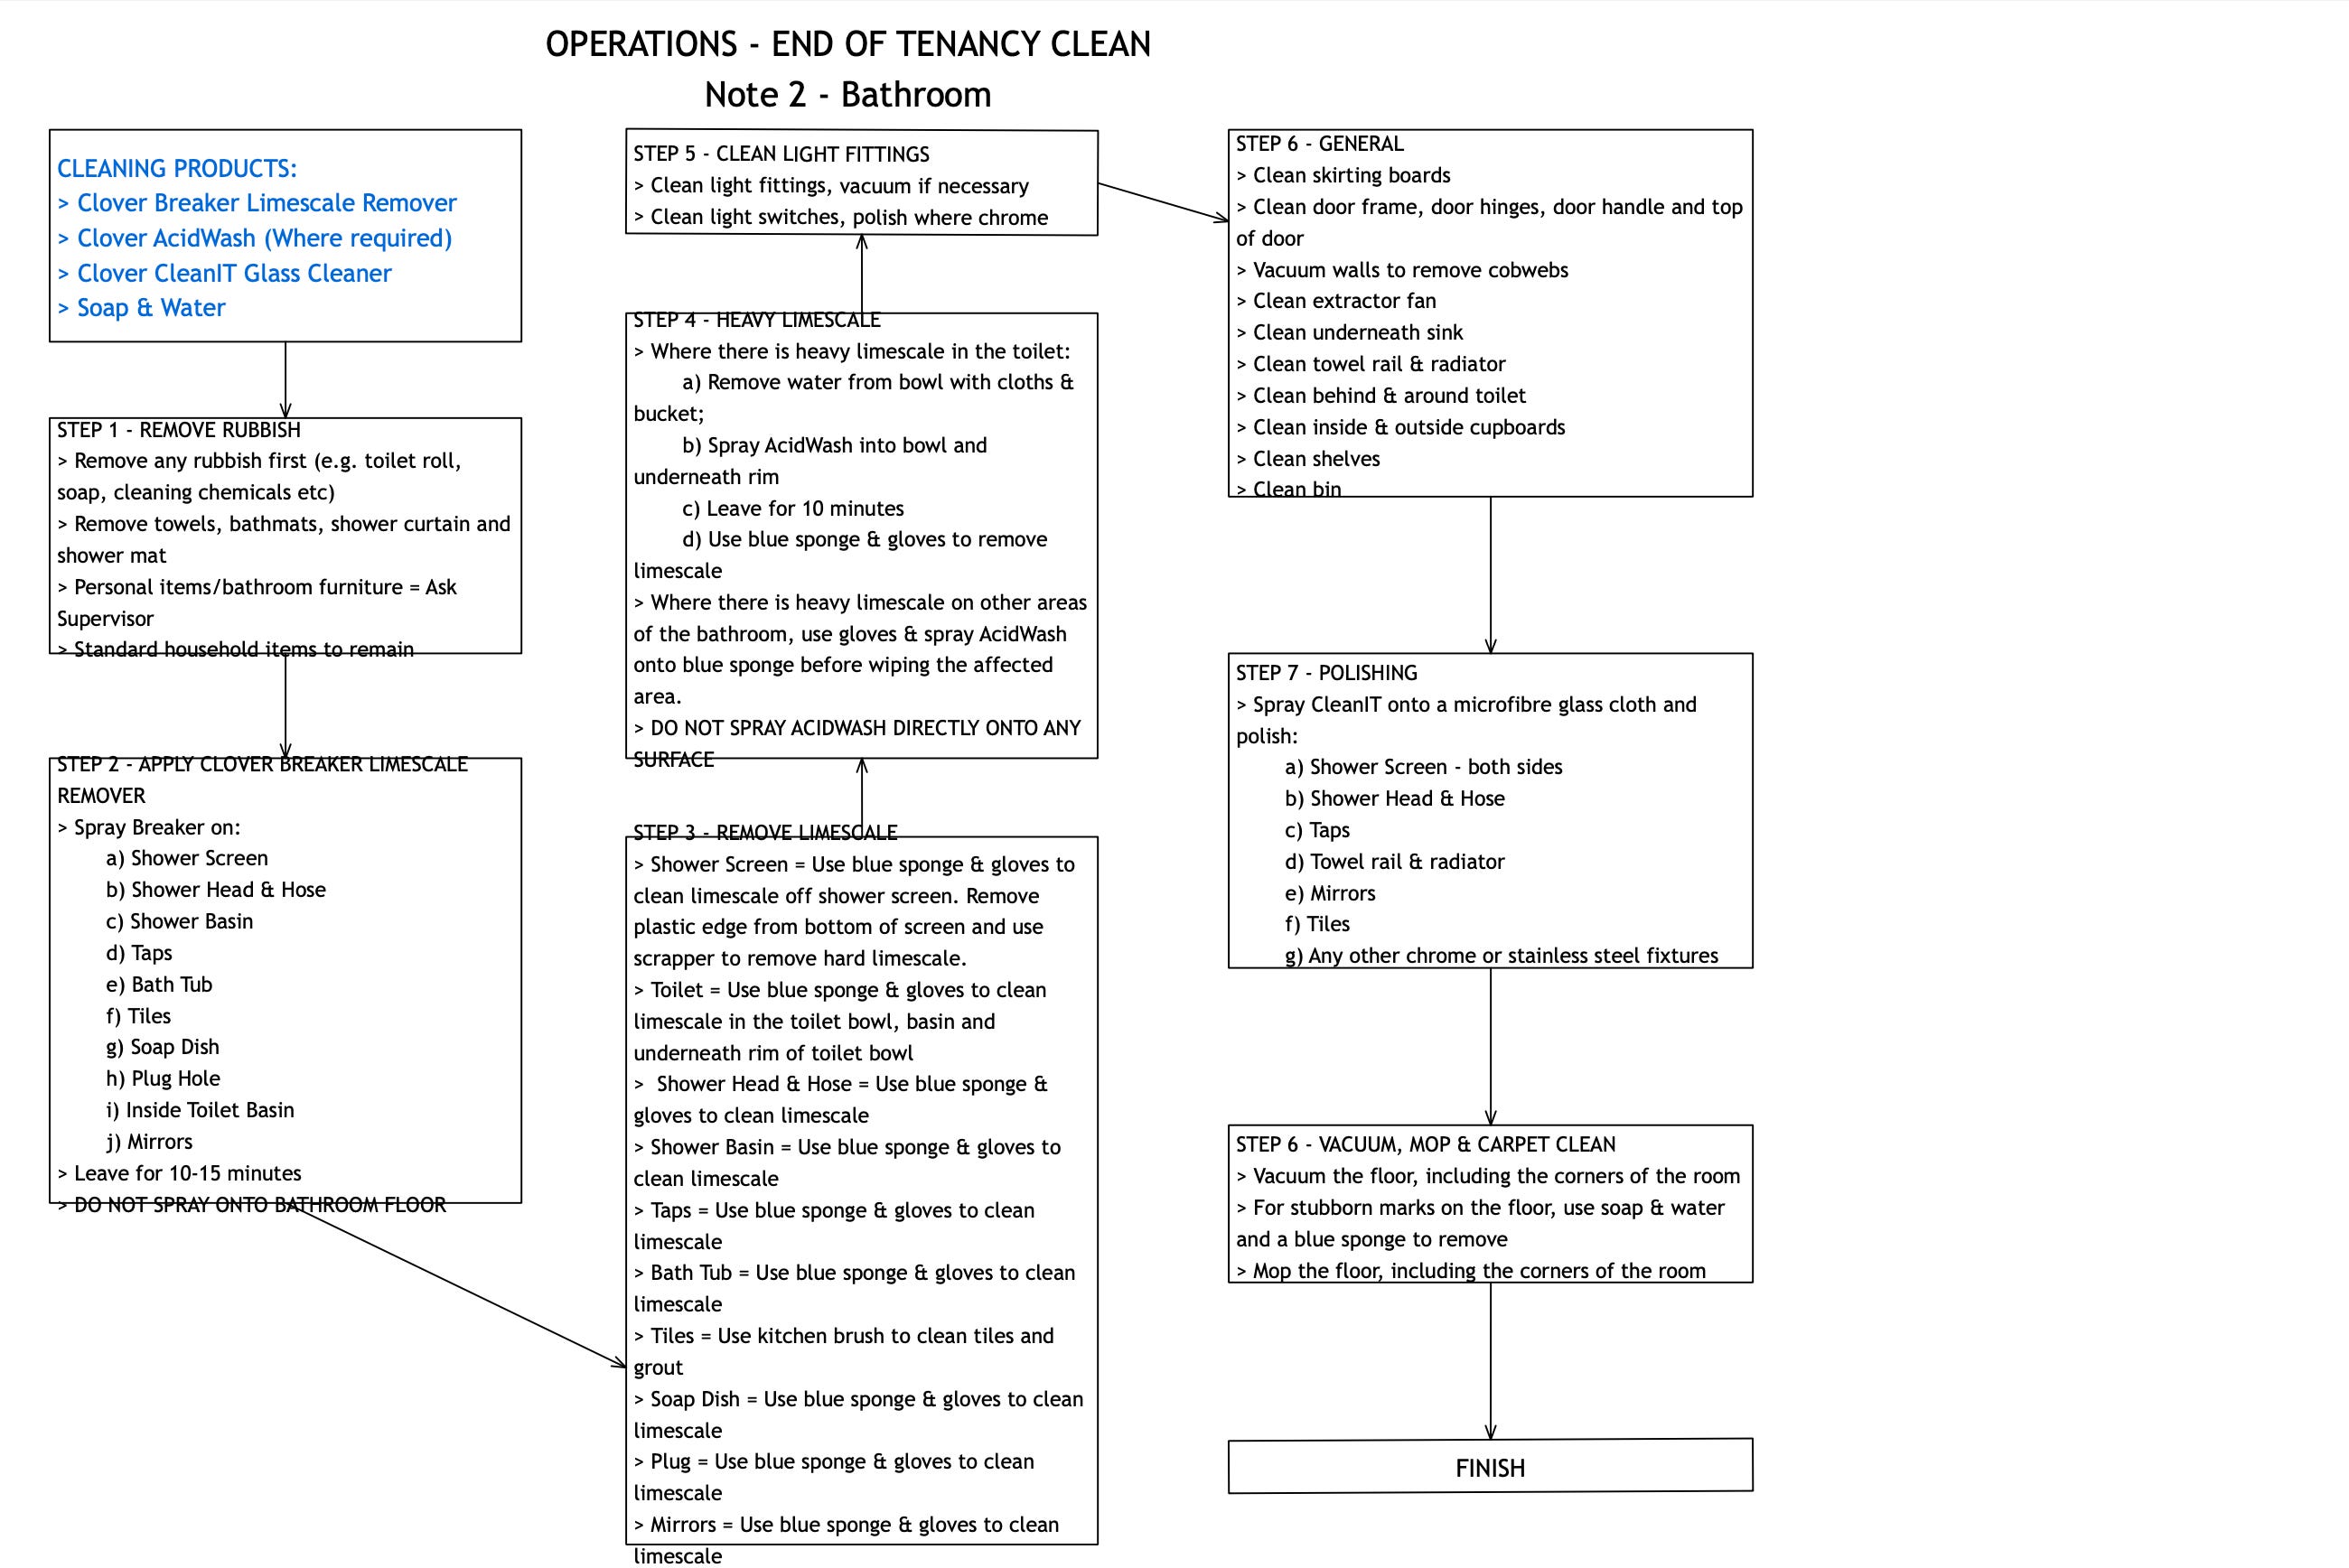
Let’s break this down 👇🏾
Products
For bathroom deep cleans, our teams used 5 products:
Multi-purpose cleaner
AcidWash
Glass cleaner
Washing up liquid
Multi-purpose cleaner is good for all surfaces. It’s not great with limescale, which is where the AcidWash comes in.
We used full strength AcidWash inside toilet bowls and a 50:50 water dilution for shower screens and fittings, sinks and taps.
You can use a milder limescale remover. However, where tenants haven’t bothered to clean the bathroom for months, it won’t give you the best results.
CAUTION: Staff need to wear gloves, goggles and a mask when using AcidWash - include this in your training.
Also, YOU CANNOT use AcidWash on Limestone or Marble. It will dissolve the stone.
You need to train staff to use these types of products properly.
I learned this the hard way and had to deal with two big insurance claims because of insufficient training.
Equipment
Pretty straight forward:
Steam cleaner - Optional (Tiles, shower screens, shower fixtures)
Scourers (Tiles, shower screens, shower + sink fixtures)
Toilet Brush (Toilet)
Microfibre cloths (All surfaces)
Glass Microfibre (Glass + Mirrors)
Vacuum cleaner (Cupboards, drawers, floor)
Mop + Bucket (Floor)
Prepare the clean
Same as the kitchen, clear all surfaces before starting to clean.
The sort of stuff tenants leave behind will include:
Shampoo + shower gel
Towels (we used to snag these and use them as rags for the kitchen)
Cosmetics
Small storage items - soap trays, tooth brush holders etc
After the rubbish had been cleared, the toilet was prepared with acid wash and the 50:50 mix was sprayed in the sink, shower/bath. It got to work quickly and needed less than 5 minutes resting time.
Where the limescale has gone yellow or brown, you’re in for a treat. That usually means it hasn’t been cleaned for a while and needs more than one application of AcidWash.
On more than one occasion our teams had to use a scraper because limescale had grown like stalagmites + stalactites!
Biggest area first
Our bathroom workflow looked something like this:
Shower/Bath
Cabinets, light fittings + mirrors
Toilet
Surfaces + sinks
Skirting board + floor
All cleans started with the biggest item in the bathroom - the shower/bath. This would take the longest to clean because of the limescale buildup.
Detailing and polishing the glass and fixtures in the shower can also take time.
The toilet might need more than one attempt to clean depending on how much limescale has built up.
Because the bathroom has a lot of wet work, the sink was one of the last items to be cleaned. Teams can rinse scourers and cloths in the sink while cleaning the rest of the bathroom.
The flowchart breaks down the individual steps for cleaning each item.
Detailing
The most notable items in the bathroom are the mirrors + glass. If they haven’t been cleaned properly, it’s easy to spot the streaks, dust or limescale deposits.
Other areas often overlooked include:
Tiles, sink and toilet bowl - Used + wet microfibre cloths leave wet dust streaks, especially on white surfaces.
Extractor fan - Especially with an internal bathroom, dust build up in extractor fans are often missed.
Toilet bowl - Limescale builds up under the seal of the toilet bowl because of constant flushing.
Underneath + on top of cabinets - Dust collects on the top and, if the cabinet is over the sink, splash-back collects underneath, which can sometimes leave stains.
Screen seal - Almost all shower screens have a plastic seal at the bottom, to stop water dripping out. This collects a lot of limescale over time, which needs to be cleaned.
Bath/shower sealant - The white mastic or silicone sealant can have black mould spots or yellow limescale build up. This is impossible to clean and needs to be replaced.
Clean out
Bathrooms are generally smaller spaces than the kitchen, but the same principle applies - clean out.
Before hoovering and mopping, our team would:
Collecting any additional rubbish from the clean; and
Collecting all unused cleaning products and equipment
Our supervisor would make sure everything was cleaned according to our checklist, all rubbish had been removed and none of our products and equipment (or anything else) had been left behind.
A final ‘buff-check’ was also carried out - checking all streaks were polished off mirrors, glass and fixtures.
Then the floor would be mopped, from the furthest point in the bathroom to the bathroom door.
On to the next room.
Next week I’ll break down the workflow our team used to deep reception rooms, hallways and stairs.
Don’t forget to check out last week’s kitchen deep clean break down [here.]
Drop any comments or questions below 👇🏾
Content to check out
This week’s episode of The Growth Lab podcast is my chat on The Confessions of a Cleaning Business Owner podcast with Louise Trehearn from the Domestic Cleaning Business Network. Listen here.
Prefer watching over listening? Check out The Growth Lab podcast on YouTube.
Need More Help?
Email me with the growth strategy for your cleaning business. The more details you provide, the more personal I can make my response.
Want to build a £100K+ sales pipeline for your cleaning business in under 100 days? Book a call.
Thanks for reading!
Matt @ The Growth Lab
Forwarded this email?
Subscribe here:
Thanks for subscribing to The Growth Lab.